Originally published in German [1].
The advantages of generative plant propagation over vegetative are undeniable. These include many opportunities for creating new varieties and for «rejuvenating» old ones. Only the microclonal propagation can compete with seed propagation. However, microcloning requires special equipment and is difficult to perform at home, therefore is practically not possible for amateurs. In nature, propagation by seeds is common. Otherwise, most of the existing species would be doomed to extinction from various diseases. A similar situation concerns now aquarium plants, many of which found their way into amateur collections 30-40 years ago. The long-term vegetative propagation of these plants has caused various fungal and viral infections in their environment. The scale of diseases sometimes becomes catastrophic and leads to the complete loss of one or another species from the collections. This sad fate did not spare Anubias either.
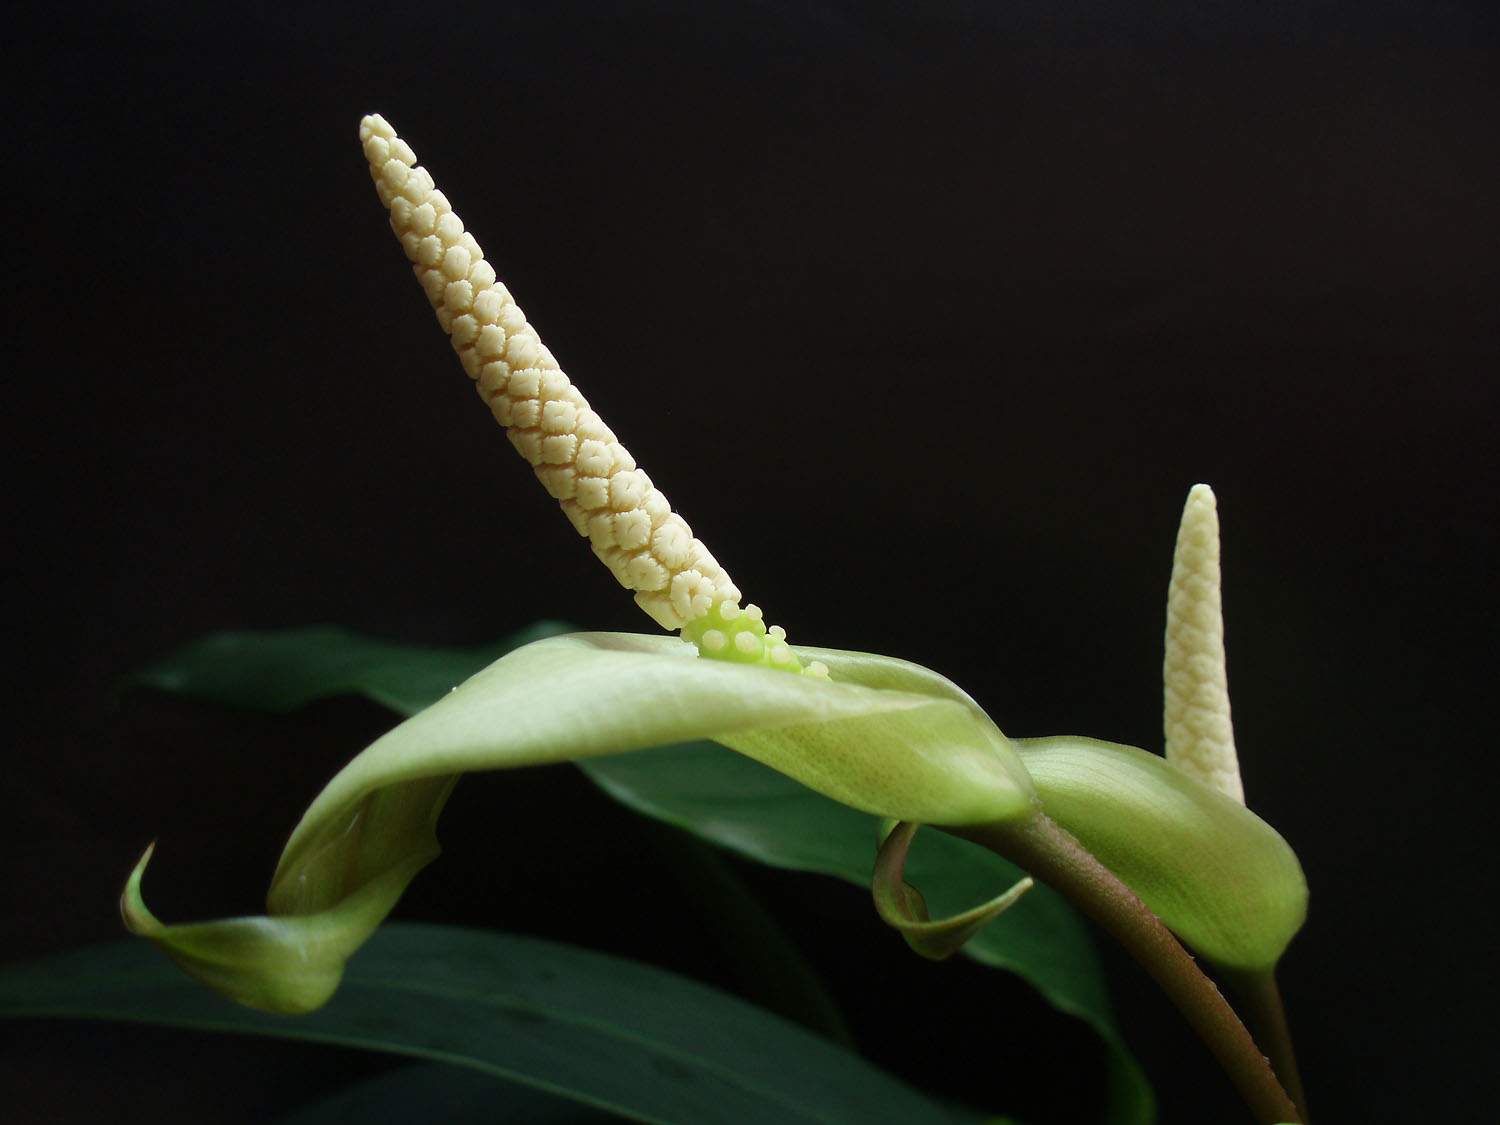
Figure 1. The cultivated specimen of Anubias barteri var. glabra (commercial name is Anubias 'minima') in a greenhouse environment. Photo: D. Loginov.
Anubias selection has received a lot of attention in the literature. In particular, examples of the production of intra- and interspecific hybrids have been described [2,3]. These works report in detail about the advantages of generative reproduction of Anubias, as well as the decorative and other qualities of the resulting offspring. While the process of plant pollination, fruit ripening and seed germination are only of secondary importance. In this article, we tried to cover all the subtleties and secrets of seed propagation of Anubias. We hope that the following information will serve as a guide to action even for ordinary aquarists and aroiders.
Part I: Pollination
Pollination is one of the most interesting stages of reproduction, since it directly refers to the flowering phase of plants. In greenhouse conditions, Anubias plants, especially small species, bloom throughout the year (Figure 1). Many aquarists manage to achieve flowering under water, but such inflorescences are of no value for our purpose. For Anubias, only cross-pollination is possible, and this can take place only in the air. However, if you do not have a greenhouse, it is not a reason to give up on the idea of pollinating Anubias. Having noticed a growing bud on an aquarium plant, you can either lower the water level or raise the plant closer to the surface, because between it and the aquarium lid there is always at least a small piece of air space.
Since we have already mentioned the term “cross-pollination,” we have to say about the next necessary condition - the presence of at least two inflorescences. The inflorescences of Anubias consist of a spathe and a spadix, on which unisexual monoecious flowers are located. The lower part of the spadix contains female flowers, and the upper part contains male flowers (Figures 2 and 3). As with most plants of the Araceae family, Anubias are characterized by the phenomenon of proterogyny, which means the earlier maturation of the female part of the inflorescence than the male part. The main purpose of this evolutionary achievement is to prevent self-pollination. To put it in simpler terms, in practice we have the fact that by the time pollen forms on the male part of the inflorescence, the stigmas of the pistils of female flowers are not active any more. Here it is worth paying attention to one more nuance - the ripening of one or another part of the inflorescence does not occur suddenly, as if on command, it is not an electric light bulb that is turned on or off by a switch. The ripening of flowers proceeds gradually from bottom to top along the spadix, and in connection with this, in the part of the contact zones, the existence of physiologically active male and female flowers ready for the formation of ovaries is possible. To prevent self-pollination, nature did its best here too. Firstly, in most Anubias there is a transition zone of sterile male flowers that are not capable of producing pollen, and secondly, by the time the latter ripens, the spathe tends to cover the stigmas of female flowers. However, despite all these tricks, cases of self-pollination do occur. However, the number of seeds produced is very small. Therefore, if you have seriously decided to start propagating Anubias by seeds and are not going to hope for chance, you need to have two inflorescences.
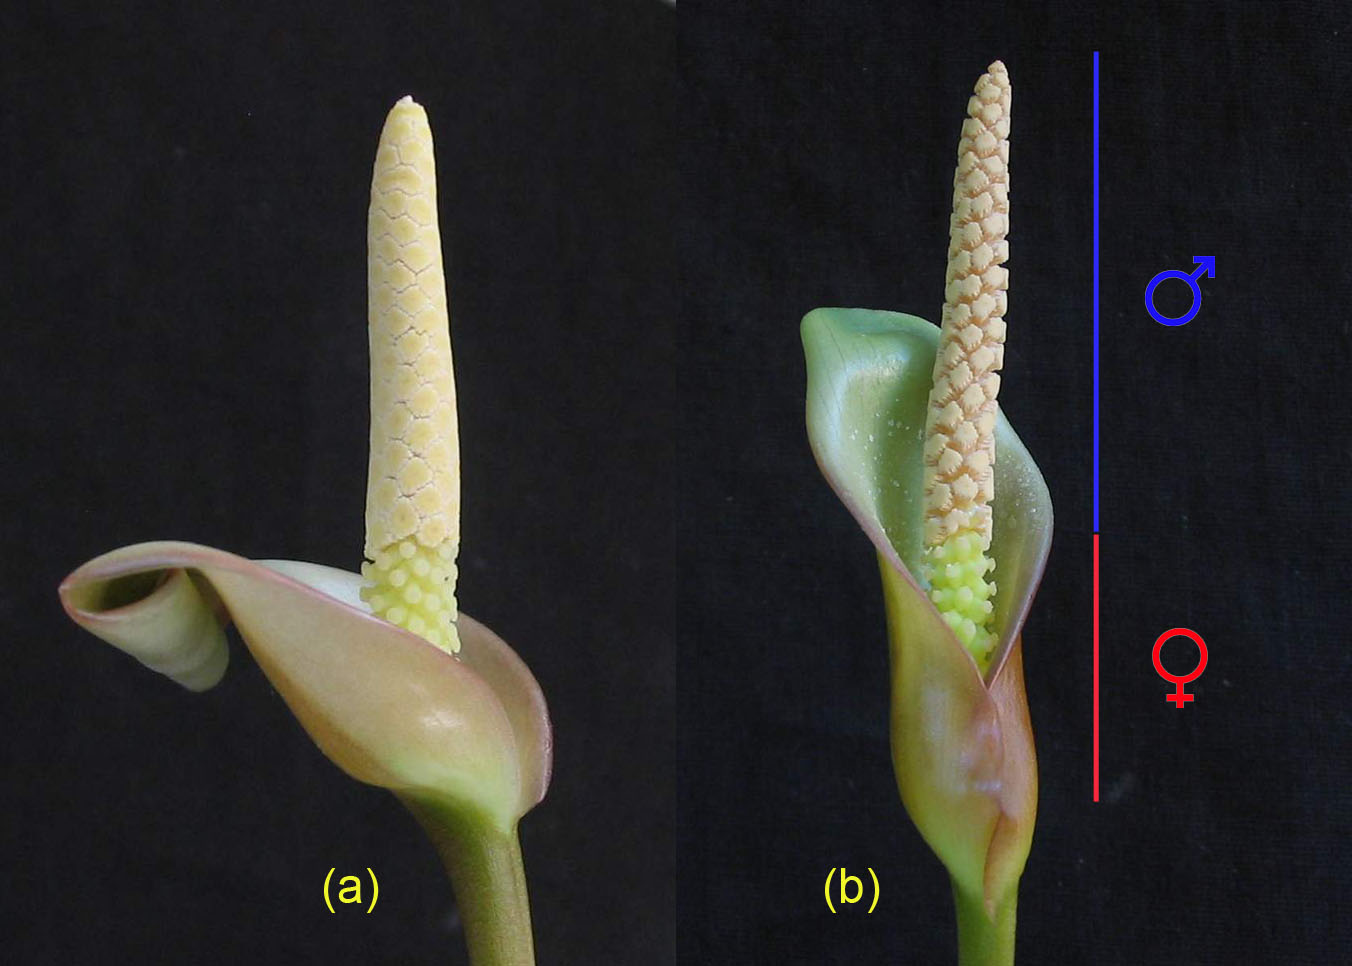
Figure 2. Inflorescence of Anubias sp. Gabon (synonym of Anubias barteri): (a) first day of flowering, (b) third day (the spathe does not completely cover the female part of the spadix). Photo: S. Bodyagin.
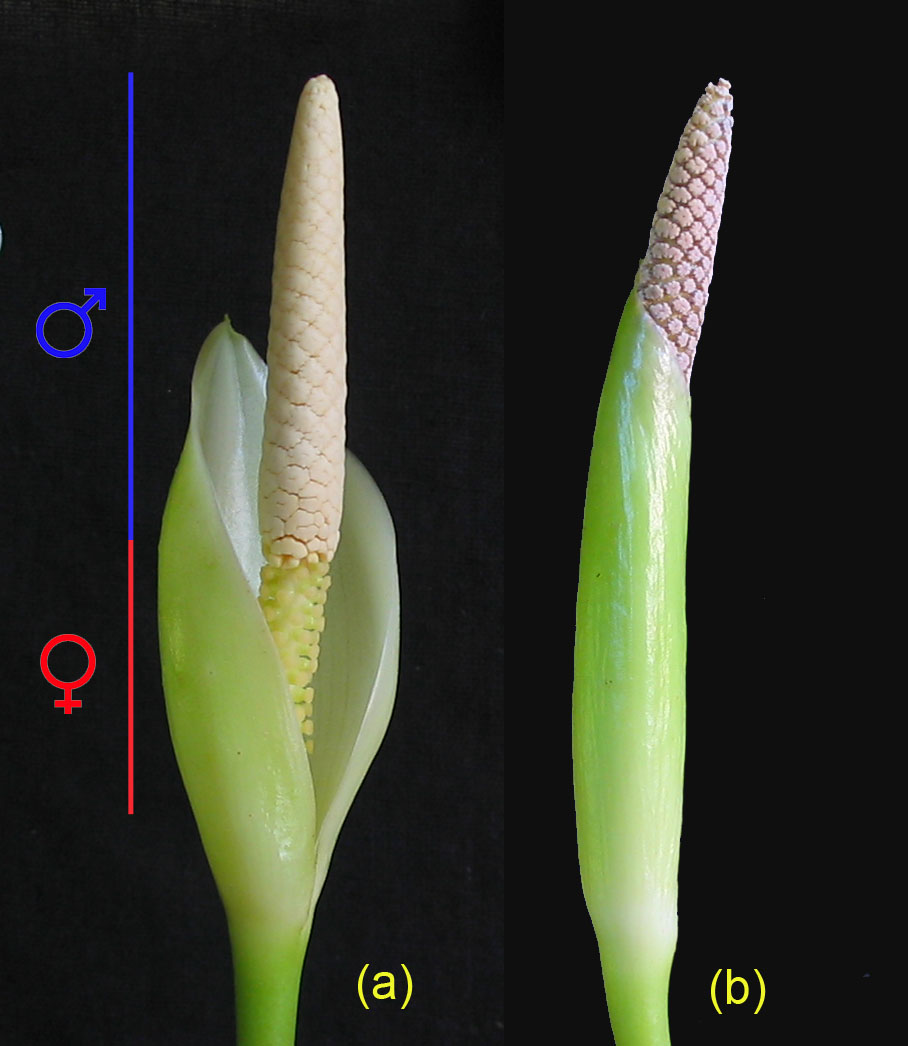
Figure 3. Inflorescence of Anubias afzelii: (a) stage of female anthesis, (b) late stage of male anthesis (female flowers are tightly covered with the spathe). Photo: S. Bodyagin.
The entire flowering cycle of Anubias lasts 4-6 days. Female flowers are ready for pollination within the first 1-2 days. Thus, for successful pollination it is necessary to have an inflorescence in the final stage of flowering (with ripe pollen) and an inflorescence that has just blossomed. If your Anubias “farm” is not very large, then you can wait a very long time for such a convenient moment. In addition, due to high humidity in small fish tanks, pollen may not form at all. Therefore, if your Anubias has pollen, do not miss the moment. To collect pollen, you need to shake the inflorescence over a sheet of paper; for this purpose, you can even cut off the inflorescence, since with the female part not pollinated, it is of no further value. Then it can be stored in the refrigerator at temperatures of 2-10 °C, after wrapping it in the same piece of paper. However, under such conditions, pollen will not keep up its properties for long (usually no more than a month). To increase fertility, it can be placed in a freezer at a lower temperature, after adding a certain amount of tempered silica gel to the container with pollen to remove excess moisture.
After you have collected the pollen, you should be patient and wait for the next inflorescence to bloom. Pollinated plants can belong to either different or the same species. In nature, the function of pollen transfer lies on insects. The literature contains fragmentary data on the involvement of Coleoptera, including the families Nitidulidae and Scarabaeidae, in this process. In addition, O. Gartner in his book “Anubias” (2010) [4] writes that in his aquariums and paludariums, pollination was carried out by ordinary fruit flies. We pollinate our Anubias with a dry squirrel watercolor paintbrush. First, we “dirty” it with pollen, and then distribute it on female flowers ready for pollination. The stigmas of these flowers secrete a special sticky liquid that enables this process. A few days after pollination, you should remove soft tissue from the male part of the spadix in order to protect the future fruit from rotting.
Part 2: Maturation
After pollination, the next stage begins - fruit ripening (Figure 4). It usually lasts 2-4 months. At this stage, the human role is minimal, if not completely unnecessary. As it ripens, a multi-seeded berry is formed in place of each pollinated pistil. In most species, the fruit is covered with a seed coat. Depending on this, its color also varies. The berries located under the coat are pale green, while the tissues of the “open” fruits are more saturated with chlorophyll and, together with the inflorescence spathe, actively participate in photosynthesis. Not pollinated inflorescences, as a rule, quickly rot after flowering ends, although there are exceptions.
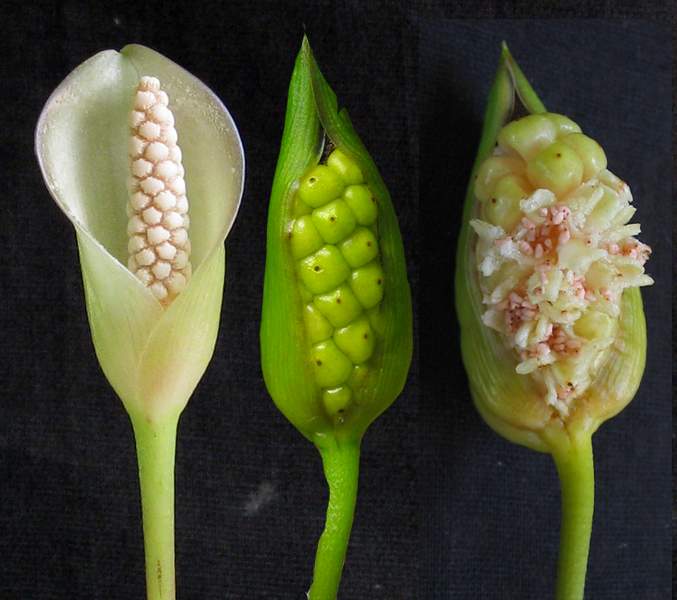
Figure 4. The development and maturation of the fruit of Anubias gracilis. Photo: S. Bodyagin.
The number of seeds in each berry depends on the Anubias species and the quality of pollination, and can be from 10 to 50 pieces. In total, a full-fledged fruit contains from 200 to 3000 seeds. The size of the seeds also varies among different species. The length of the seed is from 0.8 to 3 mm. Sometimes it happens that the fruit begins to break and the seeds come out on their own. For successful further germination of seeds, you should not wait for the soft tissues of the fruit to rot; this will avoid the occurrence of unwanted infections. In addition, if you pick the fruit 2-3 weeks before it is fully ripened, this will not affect the germination of the seeds in any way. On fruits in which the berries are covered with a spathe, the degree of ripeness of the fruit is determined by its hardness (a ripe fruit is soft).
Part 3: Germination
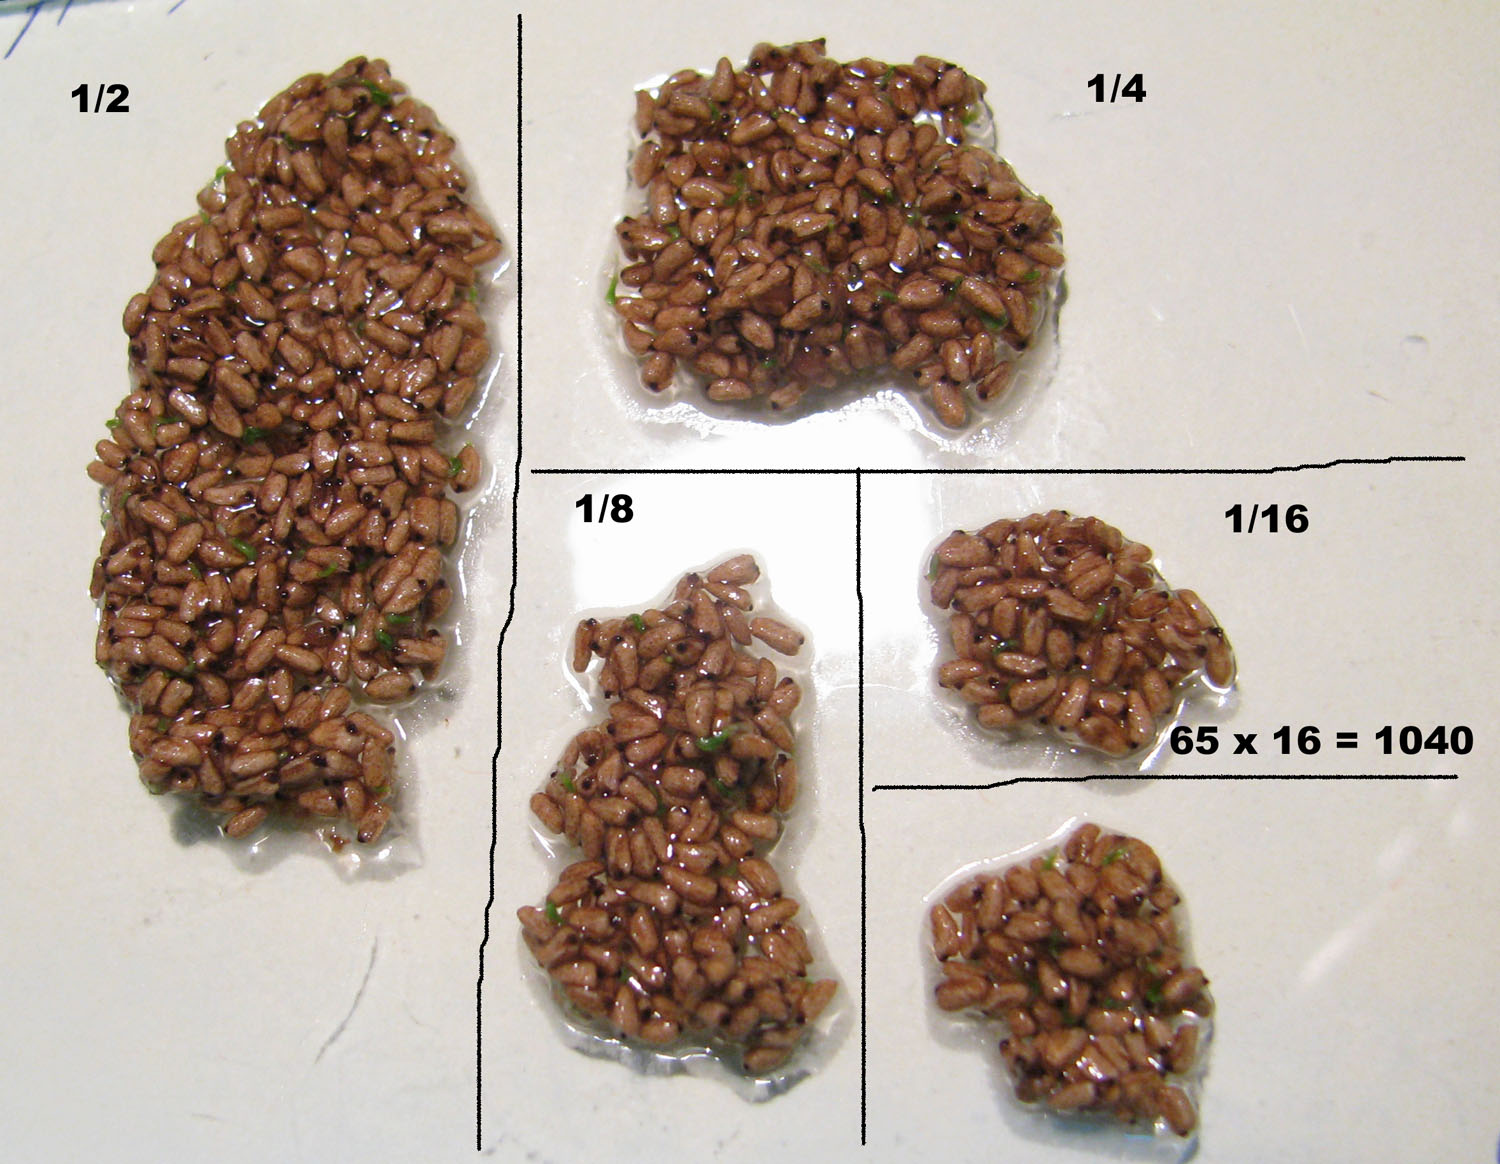
Germination of seeds and growing seedlings is the longest stage, which will require from the aquarist a certain amount of endurance. To take out the seeds, the ripe fruit is cut, wiped with alcohol, the top is cut off (there is a lot of dirt from the male flowers), and the spathe is removed. The berries (or what is left of them) are scraped with a knife into a sterile glass of boiled water. If you come across whole hard berries, they need to be crushed. After the pulp has settled, the seeds are washed and the water in the glass is changed. To count seeds, it is best to use the method of sequential visual division of the pile in half (Figure 5). By counting the number of seeds in the minimum part and knowing the number of divisions, it is not difficult to determine their total number.
Figure 5. The seed counting procedure. Photo: S. Bodyagin.
Freshly removed from the fruit, the seeds are white in color, and then in the air they quickly darken, getting a brown tint. They cannot be dried, otherwise they will completely lose their germination ability. It is highly likely that, unlike plants of temperate climates, the seeds of Anubias are not “equipped” with a shell that prevents them from completely drying out. Therefore, it is better to start the germination procedure immediately after opening the fruit.
During the stages of seed extraction and sowing, it is important to maintain extreme sterility. It is necessary to disinfect dishes with alcohol and use only boiled water. At the very beginning of their development, young Anubias seedlings do not compete well with algae and molds, so the appearance of the latter in containers with seeds is highly undesirable. For the same reason, we do not recommend planting them in a common greenhouse. However, it is worth noting that even in such conditions it is possible to germinate seeds and grow seedlings, but who needs this risk?
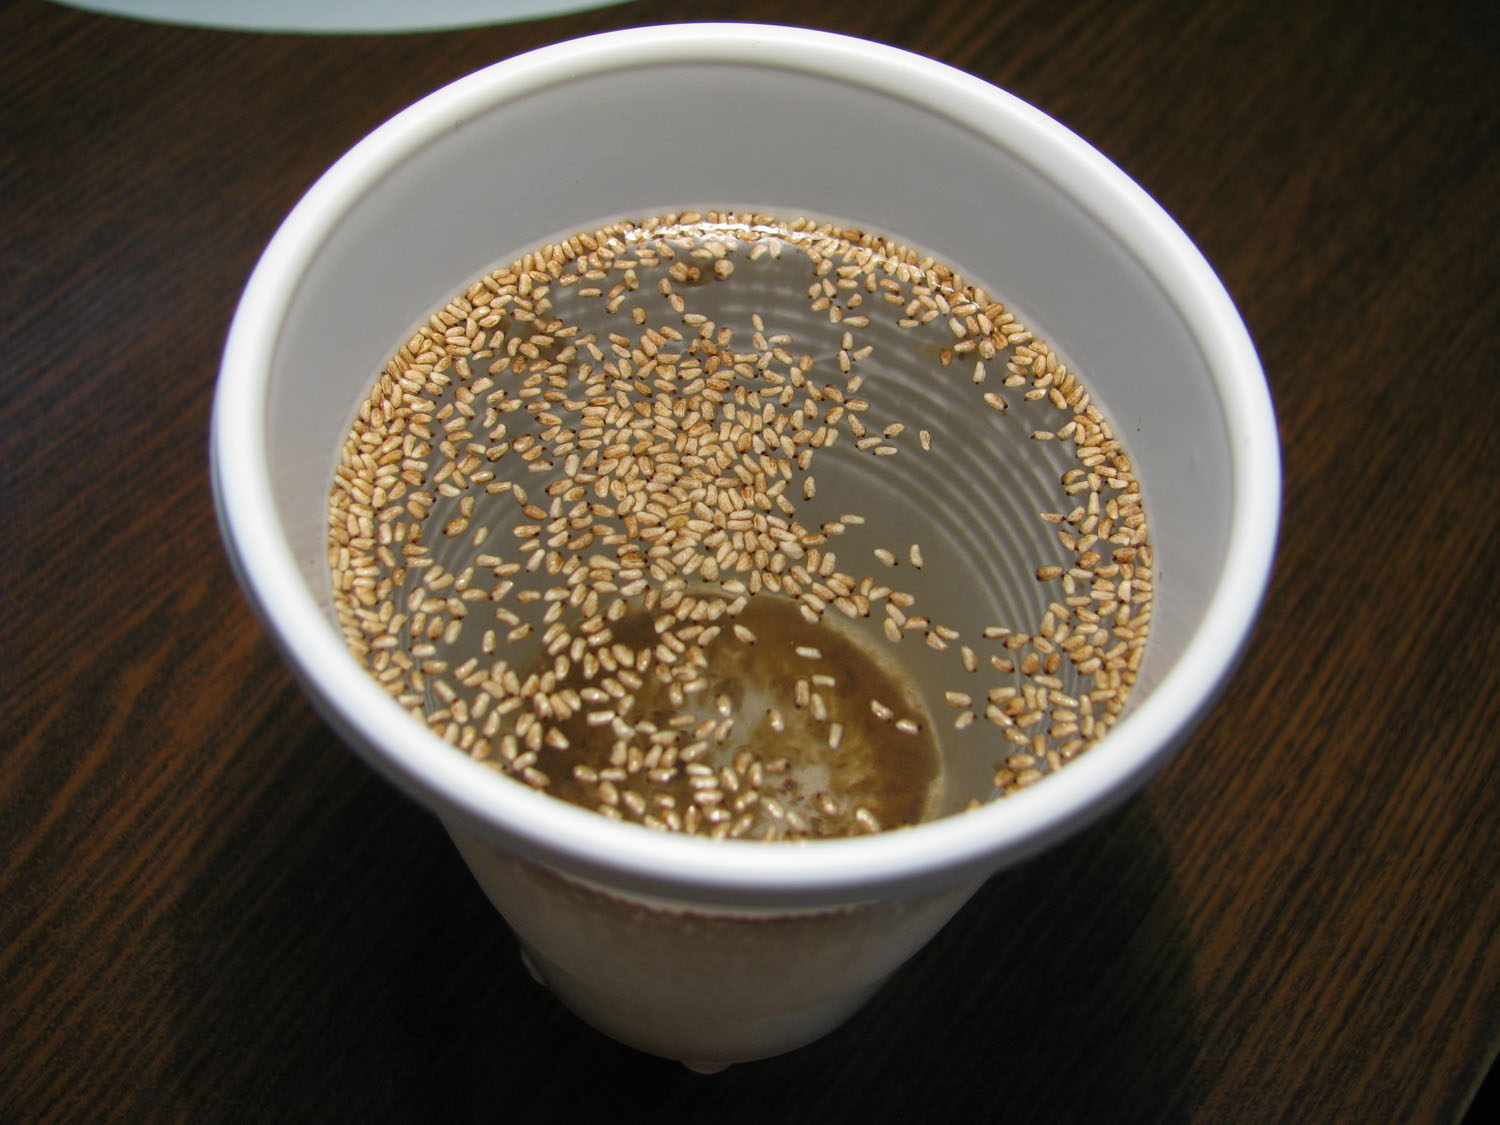
Even an ordinary plastic cup filled with water can become the first house for the seeds (Figure 6). You should cover it with a glass on top to prevent dust from getting inside. Artificial lighting is not required yet; natural light from the window is sufficient. The seeds have positive buoyancy and float on the surface of the water. After about a week, the first root appears from the seed. After this, they need to be transferred to a substrate on which they will spend the next year of their life. The choice of substrate is quite large; it can be expanded clay, pebbles and even mineral wool (pre-heat-treated). The main requirement is purity; for this reason, you should not use earth or mixtures based on it. You have to pour a solution of universal mineral fertilizers of 0.5 g per 1 liter of water into the cuvette with the substrate. After achieving some experience, you can try preparing mineral fertilizers yourself. The solution level should be slightly below the substrate level.
Figure 6. The germination of seeds in a plastic cup with water. Photo: S. Bodyagin.
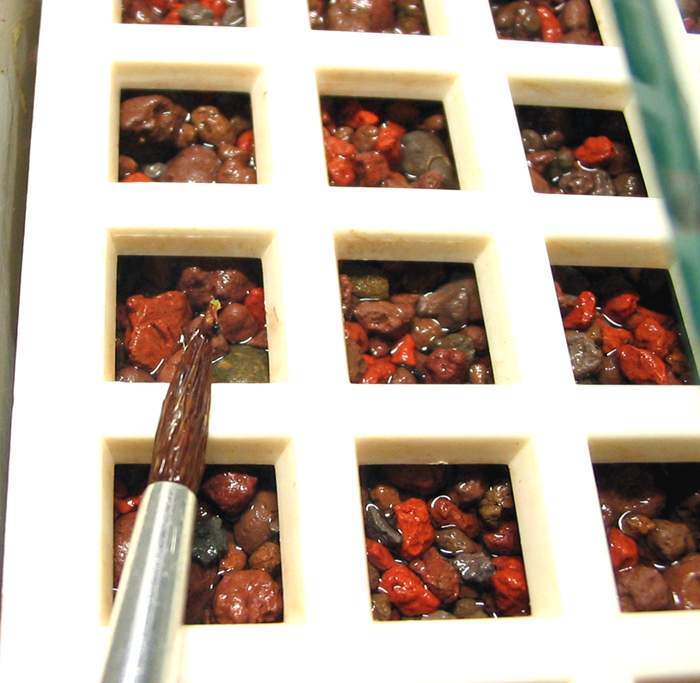
It is better to transfer seeds to the substrate one by one, using a stencil (Figure 7). This method allows you to distribute them evenly. It is important to note that you should not delay the selection of sprouted seeds, because their roots tightly stick to other seeds. To avoid damaging the sprouted seeds, it is best to transfer them using a wet paintbrush. For your convenience, it must be specially trimmed.
Figure 7. The transfer of seeds to the substrate using a stencil and wet paintbrush. Photo: S. Bodyagin.
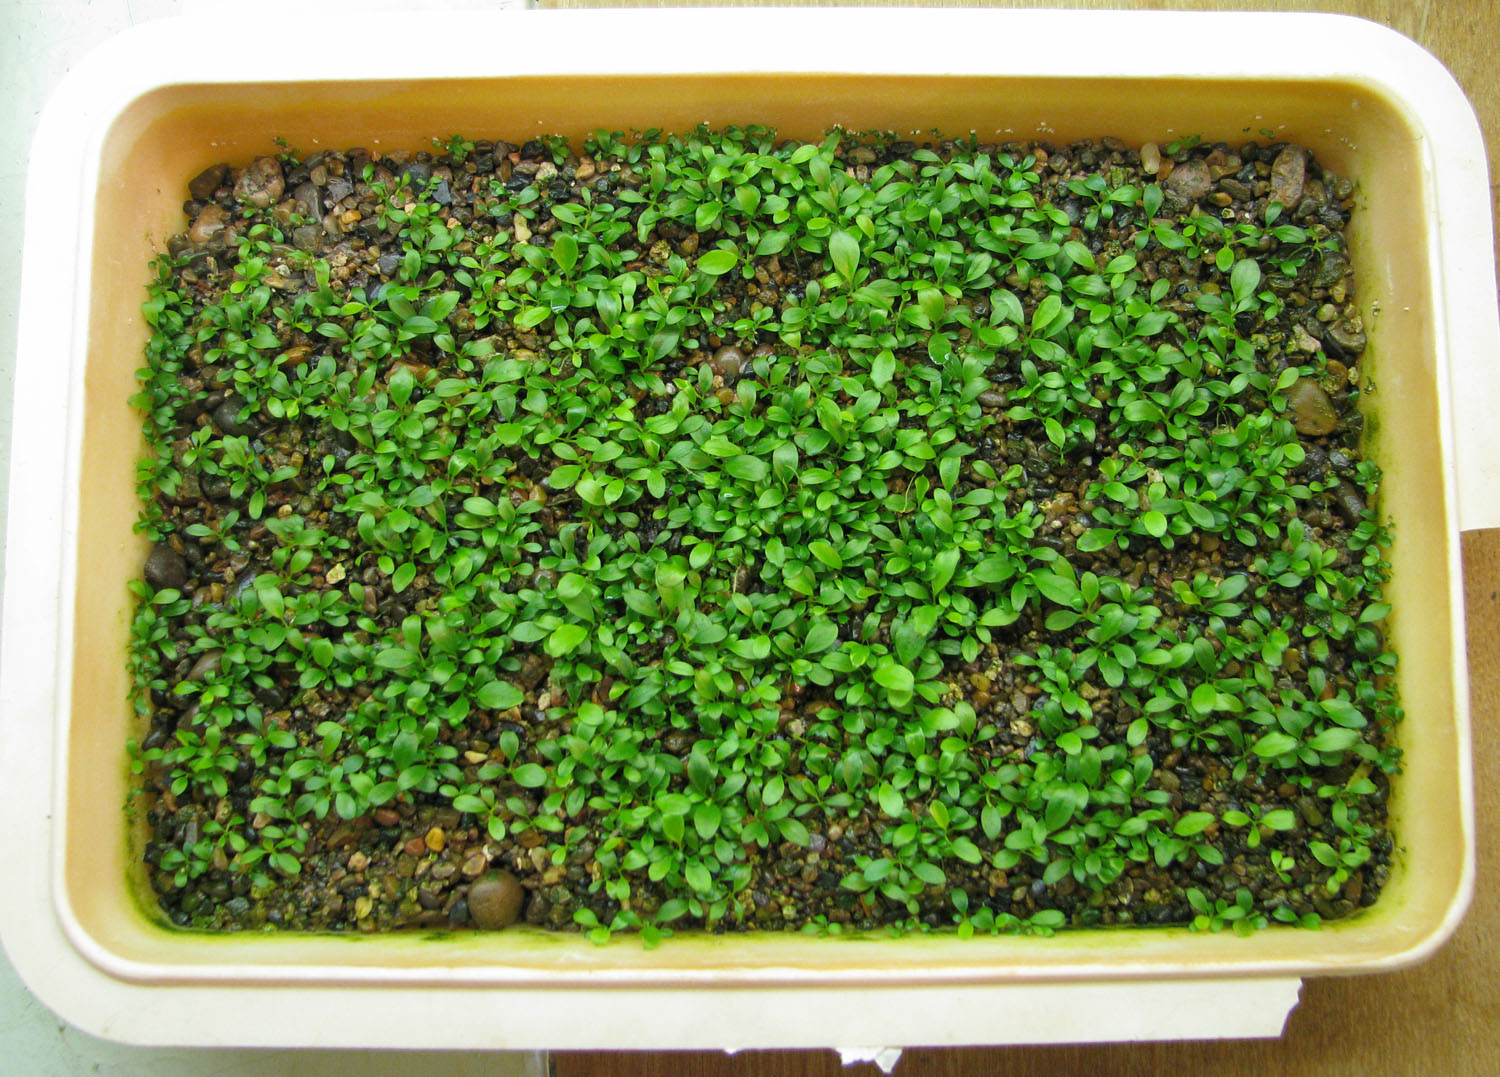
Sowing seeds can also be done «randomly», scattering them evenly over the surface of the substrate (Figure 8). With this method, you need to sow the seeds before they begin to germinate, i.e. almost immediately after extraction from the fruit. For an easy sowing (so that the seeds do not stick to each other) and more uniform distribution, they need to be dried to a moist, free-flowing state. Unfortunately, when sowing “randomly” it is not possible to achieve normal density of seedlings and their uniform distribution. As the seedlings grow, they will oppress each other, and difficulties will arise when planting them. Therefore, the “stencil” method seems more preferable. In addition, when sowing germinated seeds, the more complete ones are selected, with the greatest germination energy (those that sprouted faster).
Figure 8. Seedlings when seeds were sown «randomly». Photo: S. Bodyagin.
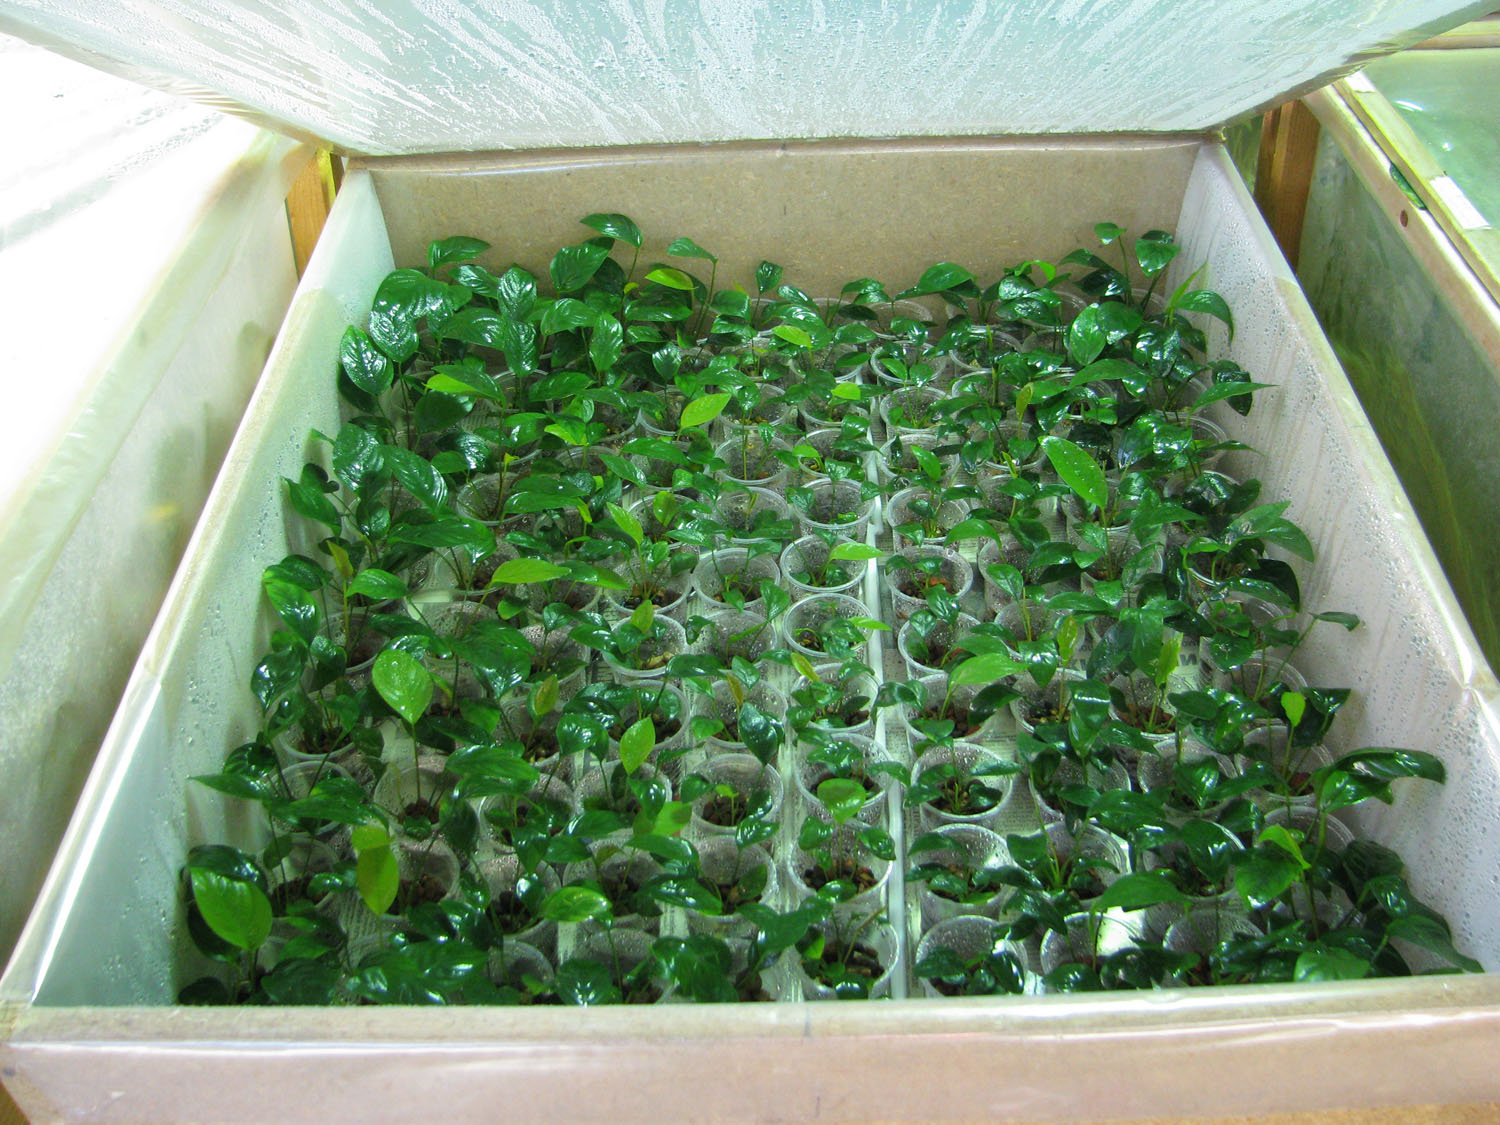
After sowing, the cuvette with the substrate is covered with glass. Further cultivation requires additional lighting. The fluorescent lamp should be located at a height of about 30 cm above the surface of the cuvette. The first 2-3 leaves appear quite quickly (in the first month of life), their development is ensured by the nutrition that was still contained in the seed itself. In the next 6-9 months, caring for the seedlings comes down to checking the level of the nutrient solution, which you top up if necessary.
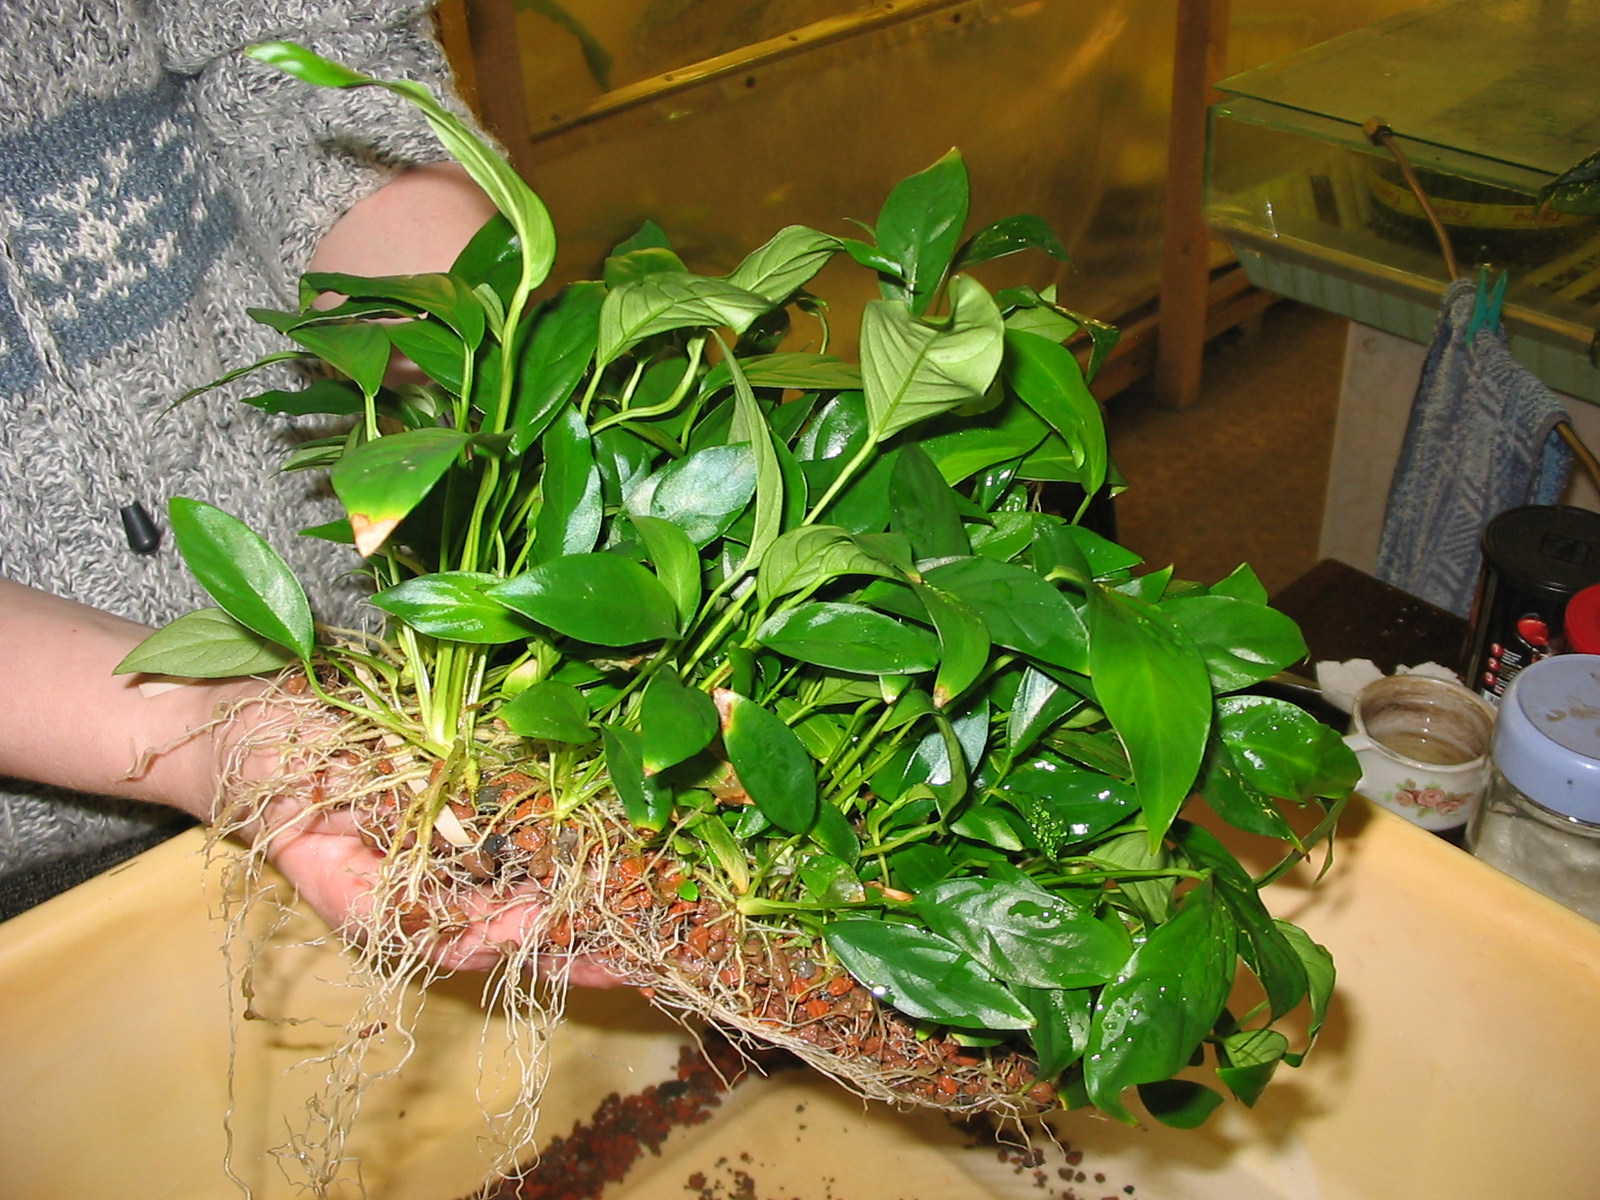
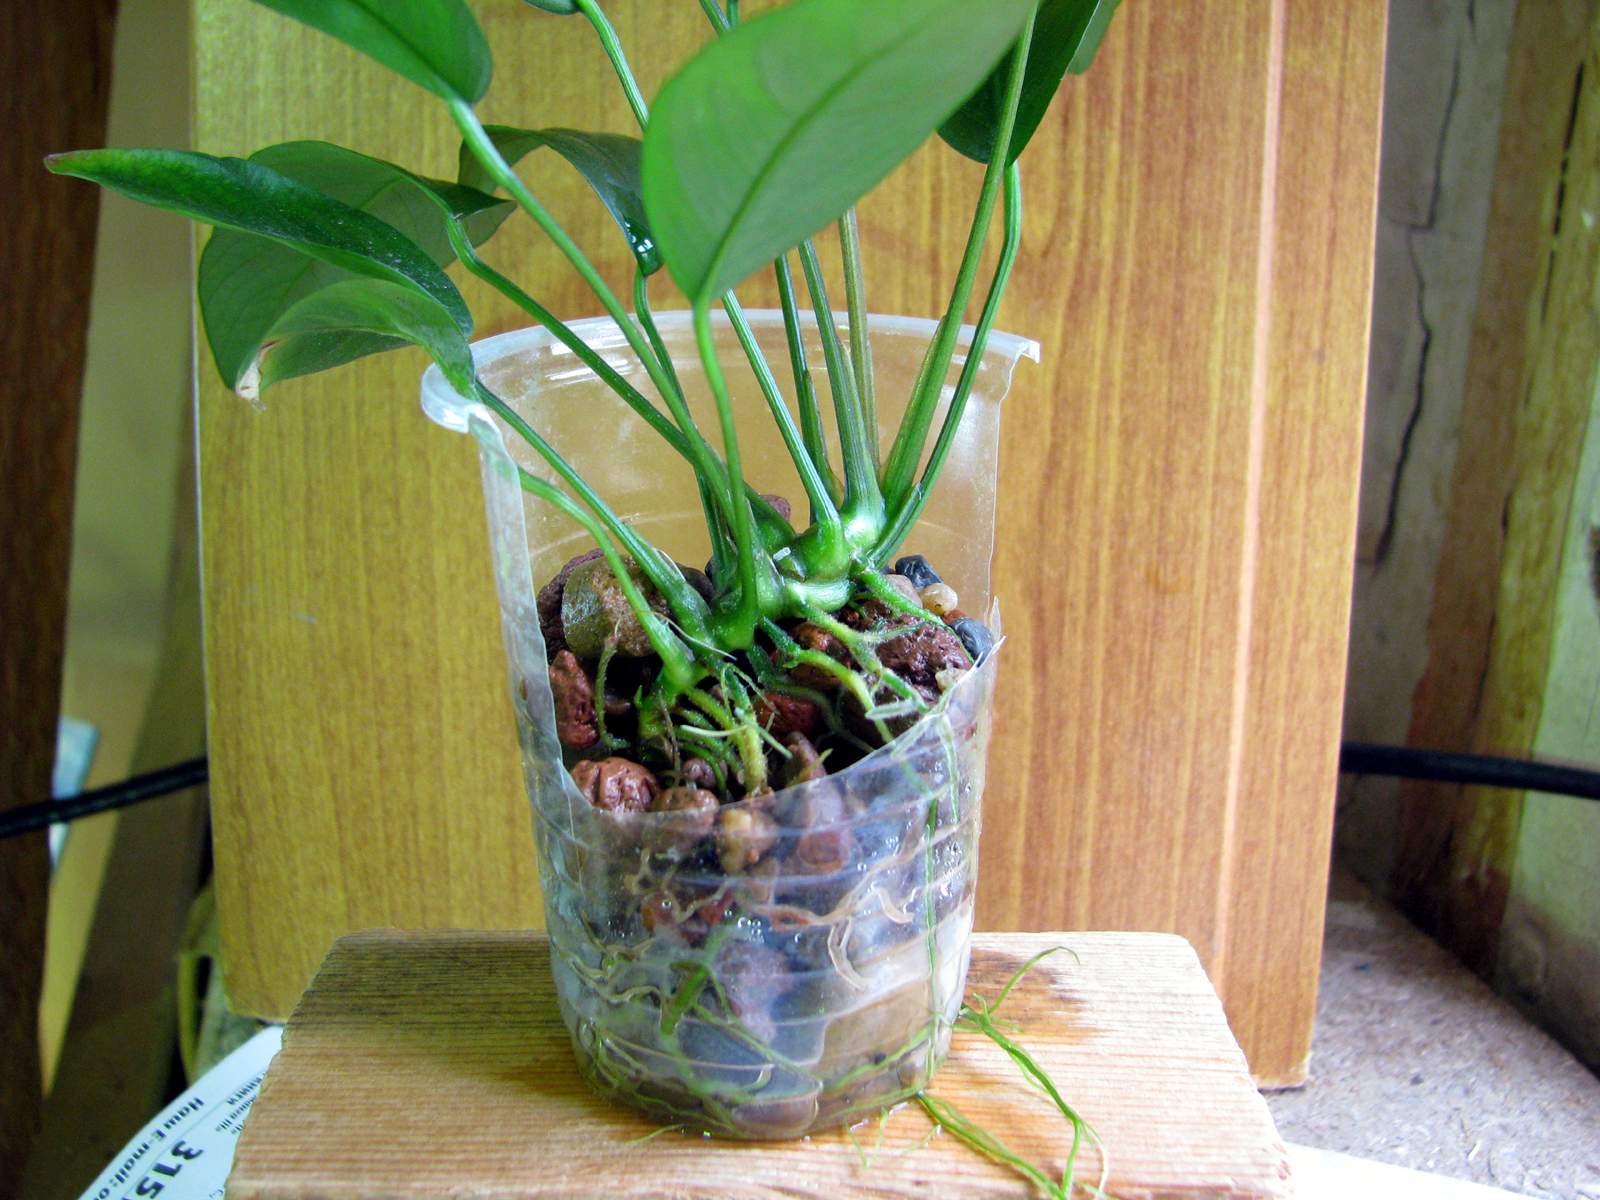
Half a year after sowing, you need to change the nutrient solution. The concentration of fertilizers should be increased to 1 g per liter. When the leaves begin to lean to the cover glass, a superstructure 5-6 cm high should be built over the cuvette. After 1-1.5 years, you can replant the seedlings in separate pots and transfer to a greenhouse (Figures 9-12). When picking, the strongest and most resilient specimens should be selected. It is advisable to destroy weaker seedlings. This is very important for breeding work. Planting in pots should be deep (the rhizome is buried in the ground). With further growth, the rhizome itself comes to the surface (Figure 13).
Figure 9. After 18 months, seedlings should be separated in individual pots. Photo: S. Bodyagin.
Figure 10. The sorting of seedlings by size. Photo: S. Bodyagin.
Figure 11. Seedlings in separate pots in the greenhouse. Photo: S. Bodyagin.
Figure 12. Seedlings (six months after the transfer to separate pots). Photo: S. Bodyagin.
Figure 13. Example of the planting of seedlings in pots. Note, the rhizome itself comes to the surface during growth. Photo: S. Bodyagin.
To summarize, it is worth noting that from the moment of pollination to the production of an average-sized plant (15-20 cm in height) it takes about two to three years. Aquarists can use seedlings at almost every stage of their development, depending on the tasks and artistic intent. Mats made from six-month-old seedlings are suitable for the foreground even in nano-aquariums (up to 20 L), and three-year-old seedlings can be used to decorate large tanks with a volume of more than 300 L.
References:
1. Bodyagin, S. & Loginov, D. (2011) Anubias durch Samen vermehren. Aqua Pl. (3): 96–103.
2. Gartner, Otto (1997) Speerblaetter. Das Aquarium 340: 24–28.
3. Bodjagin, S. (2002). Anubiasi na luboi vkus, Russian Journal “Aquarium” (1): 22–24.
4. Gartner, O. (2010): Anubias. ÖVVÖ, Wien.
Bodyagin, S. & Loginov, D. Anubias by Seeds: from Start to Finish.... Newslett. Int. Aroid Soc., 46(1)/2024, pp. 8–12.